What You’ll Need:
A sewing machine
1 yard of 3” lace trim
1 yard of 1” black elastic
2 yards of ¼” lace elastic trim
1 yard of ½“ black
elastic
black thread
Hook eye bra clasps
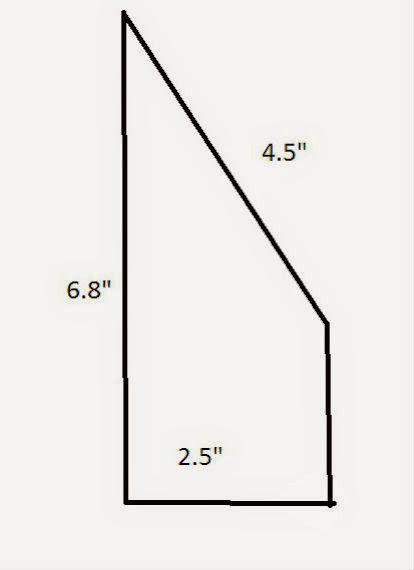
You will also need a pattern that looks something like the
image below for the cups my pattern is made to fit an extra small or small bust
( I wear 34A) with 1/2” seam allowances. If you need a larger size simply take
your own bust measurements and adjust the pattern to fit.
1. Cut
your lace into four 7” pieces, then pin and cut out four of your bra cup
pattern.
2.Sew together the red seams with
the blue with a zig zag stich. Your cups will now look something like this:
3. Next on the wrong side we are going to fold and pin the centre of the cup into a ¼” seam and
sew. Trim away any excess lace to reduce bulk. This step reduces puckering
and is optional but highly recommended.
4. Measure out then sew the lace elastic to the side of your cups with a zig zag stitch.
5. We are almost done! Now for the band and straps! Take a measurement right
under your bust and cut your 1” elastic to this size. Attach your clasps
on to either end of the elastic. The placements of the cups are completely
up to you. I made mine about an inch apart and around 4” from each clasp.
When you are happy with the placement pin and sew with a straight stitch
with a ¼” seam. For the straps take
your ½” elastic and pin it to the top of your bra cups. Next try on your
bra and pin the end of your 1/2” elastic to the band. When you are happy
sew on your straps with a straight stitch.
aaaaannnnnddddd you're done!
Tag me on instagram @khyrag to show me your versions and how you style it!
Happy Making ;)


Thanks for sharing. I will definitely try it.
ReplyDeletehttp://tsfbykatarina.com/
Slightly confused about step 3 (sorry, new to sewing!) - Do we just folding down the excess fabric to form a little triangle, sew that down and cut off the rest? :)
ReplyDeleteSorry for the late response, you are exactly right! This little triangle is called a dart and its going to reduce any puckering and allow for the bra to fit better to the chest while trimming reduces bulk. If you try on your bra after step two and feel it fits fine feel free to skip that step. Hope this helps! :-)
Delete